


Table of contents
- Understanding the basics
- HTML
- Styles
- CSS
- What has this all to do with Xojo Web 2.0?
- What is bootstrap all about?
- A lot of theory, show me more insights!
- How can we change the built-in Bootstrap Template of Xojo Web 2?
- The good news
- A quick look under the hood
- The less good news
- A deeper dive into the customization of your template!
- Let’s talk about tools
- Prerequisites
- 1. CSS File
- 2. HTML File
- Finally, we can customize our bootstrap file
- It doesn’t work for me!
- What are the next steps?
Beginners seem to be facing issues to change the built-in Web 2 Bootstrap template of Xojo Web 2. If someone is not used to it, it is indeed difficult to learn CSS in parallel to absorb all the new functionality of Web 2.
Understanding the basics
There are many possible workflows to get the job done, and many can be achieved, without touching any third-party tool but by using the developer tools of your browsers.
The purpose of his tutorial is to explain the backgrounds to a beginner. Please bear with me, that consequently it might be imprecise for seasoned developers. The more experienced user should anyway start reading the chapter “ A deeper dive into customization of your template! “
HTML
As you are reading this, I assume that you have at least a minimal understanding of HTML. If not you should have a look at w3schools.com.
This is a simple sample of an HTML page:
<!DOCTYPE html> <html> <head> <title>Page Title</title> </head> <body> <h1>This is a Heading</h1> <p>This is a paragraph.</p> </body> </html>
Styles
With styles you can change the look & feel of your code:
<!DOCTYPE html> <html> <head> <title>Page Title</title> </head> <body> <h1 style="color:blue;">A Blue Heading</h1> <p style="color:red;">A red paragraph.</p> </body> </html>
CSS
A CSS file is its own file containing nothing but all “styles”. You can use them in your HTML code by referring to them through classes or “overwriting” the style of an element. The following code is showing how the code in the paragraph above will look in a CSS scenario:
<!DOCTYPE html> <html> <head> <link rel="stylesheet" href="styles.css"> </head> <body> <h1>This is a heading</h1> <p>This is a paragraph.</p> </body> </html>
and the mentioned CSS file ‘styles.css’ will look like this:
body { background-color: powderblue; } h1 { color: blue; } p { color: red; } view raw
What has this all to do with Xojo Web 2.0?
What is bootstrap all about?
Xojo Web 2 is based on a web framework. The used framework is called Bootstrap. If you are interested in learning more about web frameworks, Wikipedia is a good starting point:
There are many frameworks out in the wild. Many are passing away over time, others are known to be relatively or very stable. Bootstrap belongs to the latter category and this is the reason why Xojo Web 2 is using this particular framework. Love it or hate it, there are little chance it will change any time soon.
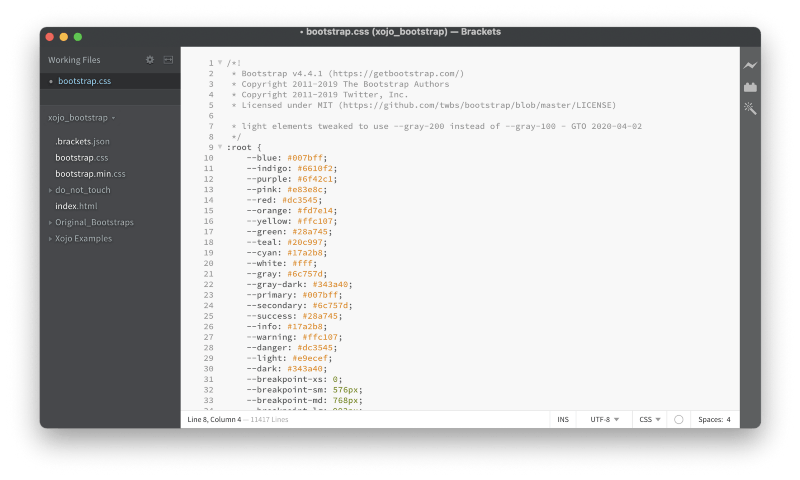
Bootstrap has its own CSS file, where all the default colours, margins, etc. are defined. The file is called: bootstrap.min.css. The word “min” stands for “ Minification “. That’s important to understand, as a minified CSS file is utmost impossible to edit but the final version should be minified to reduce the load for the browsers to a maximum. The fact that this file is minified might be a big stumbling block for beginners as it looks weird. No worries, we will tackle this later.
A lot of theory, show me more insights!
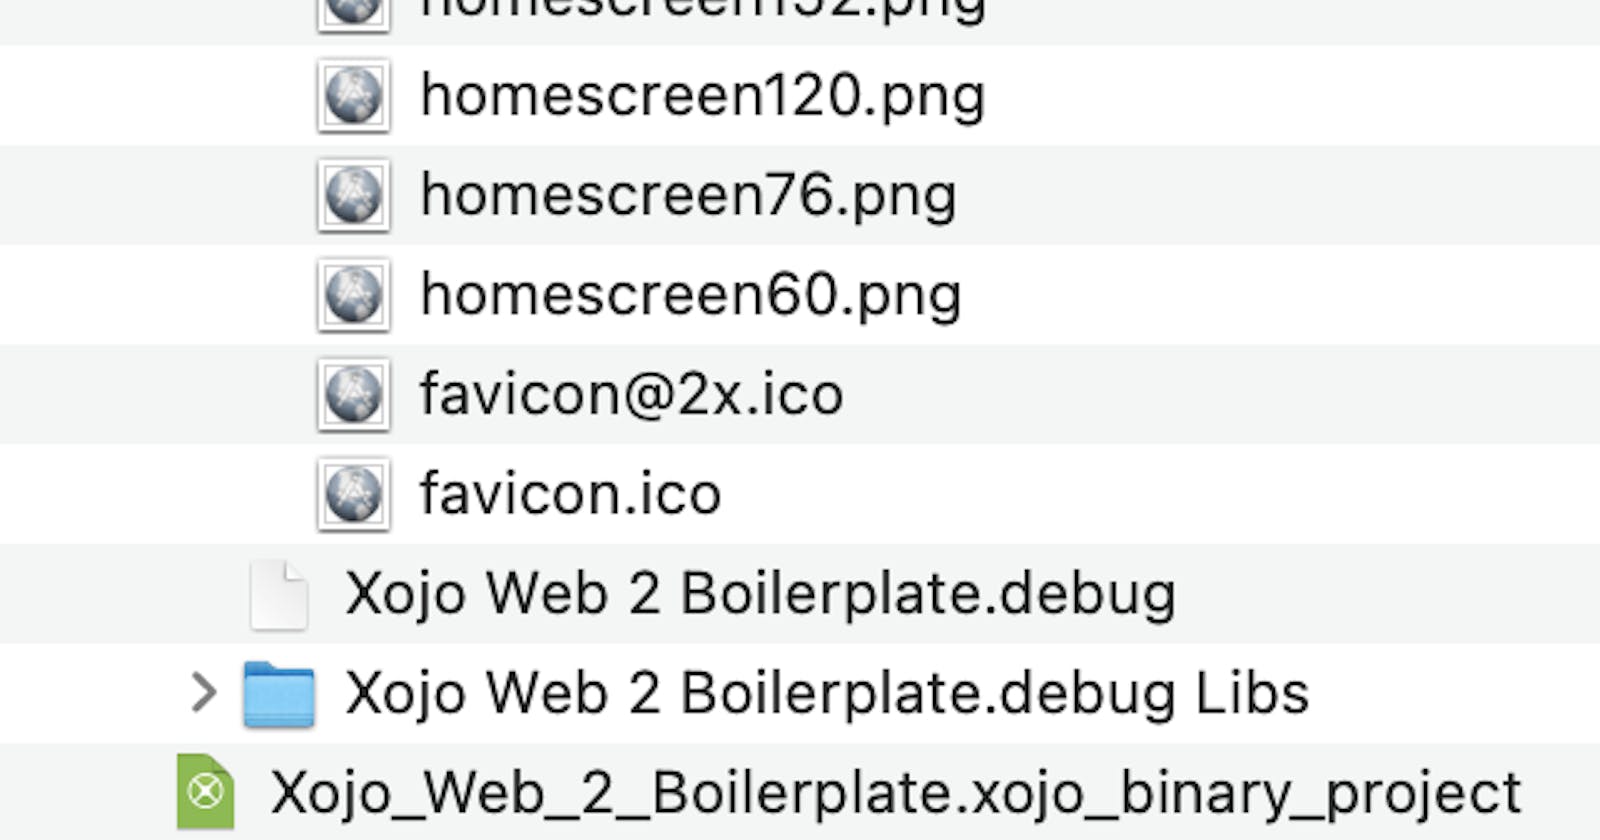
On my GitHub repository “ Xojo Web 2 Bootstrap Boilerplate “ you will find a binary file in the “Xojo Examples”-folder (so it can be used by every Xojo user) called:
Xojo_Web_2_Boilerplate.xojo_binary_project
This program has no functionality other than showing a handful of buttons in all kinds of colours.
Let’s debug the program. The IDE will create a build folder (usually in the location of your binary file). This is the next part where some might be struggling, you don’t find any trace of a CSS file in these folders:
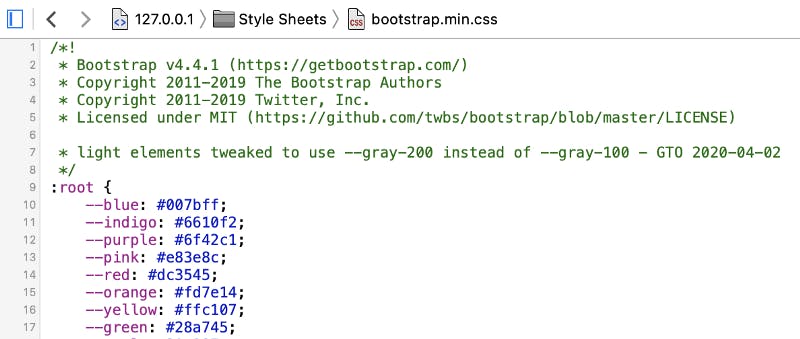
The reason is simple, Xojo is managing (and providing) the bootstrap CSS file internally, so you will NOT see it in your resources. But let’s look deeper at the browser running our app in debug mode. I’m using Chrome in this example (Depending on the browser you are using, you might have to switch on the Developer functionality).
Look at line 18, there it is! We found the bootstrap.min.css.
Now manipulating this file would not make any sense as it is “volatile” and will change with every compilation. This explanation is only for you to better understand the logic. The Xojo App is feeding the browser with a bootstrap CSS file, and this file is responsible to define many aspects of your app.
How can we change the built-in Bootstrap Template of Xojo Web 2?
The good news
The Xojo development team made it very simple to add your own bootstrap.min.css (Note: it has to be named exactly(!) like this).
Just drag and drop your bootstrap.min.css file into the IDE and you are done. I created on my Github repository “ Xojo Web 2 Bootstrap Boilerplate” a folder *“*Xojo New Bootstrap Template “.
Please move the bootstrap.min.css file from within that(!) folder into your IDE, where of course our dummy project has to be open.
As you can note the design in the IDE did change, and an item called “ bootstrapmin “ is showing up in your outline. For the time being there is no special functionality behind this item, it is only an indicator that you have inserted your own minified Bootstrap CSS file. You can double-click on the file, but as it is minified, you will have no fun editing any larger changes.
After running the App again in the IDE, we can notice that the layout changed (different and smaller buttons).
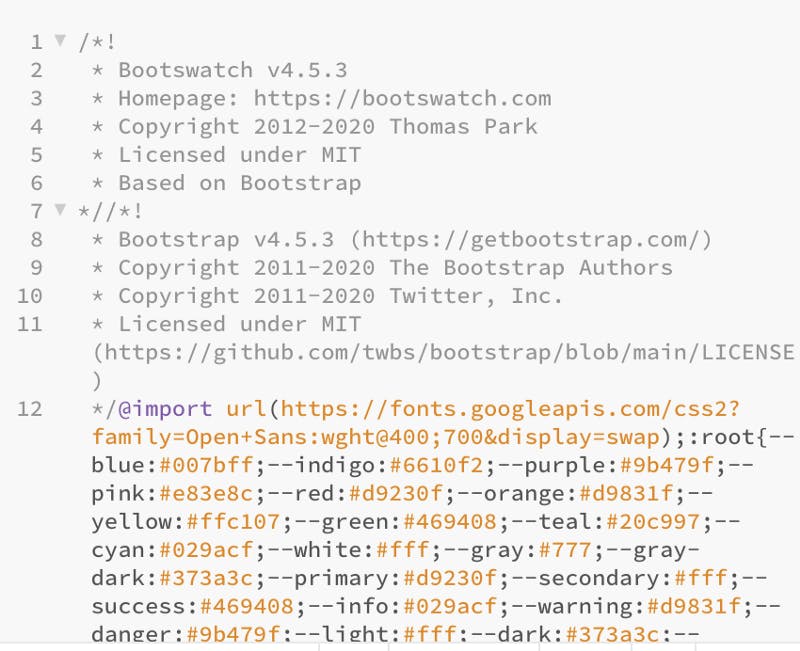
The Bootstrap sample applied in the above example is SIMPLEX, which you can download here.
A quick look under the hood
If you look into the debugger file now, you will see a change there as well:
This is not too important to memorize and not useful (you should never change this bootstrap CSS file, as it will get overwritten via your next compilation) but it is an indicator for you that your project is using a customized bootstrap.min.css.
The less good news
As you have seen the buttons in our example are a bit smaller. If you are making big changes in your CSS Layout this will consequently mean, that you have to reflect these changes in your UI design as well. You might prefer the look of smaller buttons, but it can very well be that your caption text will not fit any longer.
The same applies to changes in font types, margins, etc. Some people dislike this, but it’s just the nature of the beast and was no different from the style manager of Xojo Web 1. If you will make significant changes in your own Bootstrap CSS file, you will most likely have to reflect all those changes in your UI. Keep that in mind! This is just what web design is all about it. It is no different for WordPress or any other web application which is using Bootstrap. It works fine out of the box, but if you are making customizations, you have to live with the consequences (and/or handle them).
In our next chapters, I will show you my workflow to adapt the standard template of Xojo Web 2.0. Before you continue to read you must be familiar with the concepts explained above. For a beginner, it is probably a good moment to play around with a few examples and see the changes in the IDE and the final app.
For reasons of simplicity (and very likely laziness) I used only buttons in my example. Add other components from the Xojo library, add a new bootstrap theme and look at how things will change in between. It is always important to get a “feeling” about what is going on. No one can teach you that experience, you will learn it best by trying it on your own. Don’t be frustrated if it doesn’t look quite nice, that’s not the purpose of this exercise.
You can download pre-made designs at bootswatch.com and many other places on the internet. Search engines are your friend. But be prudent*! Many people are facing challenges with bootstrap — You will find a plethora of pages offering fake templates, or fake apps promising you an easy layout of templates, etc. Please think twice if a site is safe or a hoax.*
A deeper dive into the customization of your template!
At the very beginning, I showed an HTML file calling (or better embedding) as a CSS file. I showed above that this is exactly how Xojo Web 2 is working as well. The Xojo app is drawing the overall “architecture” of the app, which means the controls and where they are located but it is mainly the CSS file, which is defining the real look and feel.
Now how can you change and — more importantly — preview the changes you are making in a CSS file?
You can only preview the HTML code of a file without CSS but the CSS file alone will be previewed as pure text in any browser. And HTML without CSS doesn’t look good: It is important to understand that both files are working together. The whole concept of cascading style sheets is about separating the content and structure (HTML) from the design (CSS). But you need to have an HTML document that embeds your CSS file to preview any changes you make in CSS. Let’s first look at the following screenshots:
1. Browser-view of the HTML file w/o the CSS file:
2. The minified CSS file opened in a browser:
3. the HTML / CSS combo viewed in a Browser:
Two things are important to note for §3:
It only works fine in a server environment (more on this later), but the above template needs to run javascript, etc.
The HTML needs to have a line embedding the CSS, e.g.
The “../” sequence means that the bootstrap.min.css file is located in the same folder as the html file.
Learnings:** We need some HTML documents to show the CSS elements we want to change (otherwise we can’t preview them).
* We need to embed our CSS file into this HTML file.
* We best need a little server environment to mimic the future server architecture.
This said: we should best work with some tools to get all this achieved and not reinvent the wheel.*
Let’s talk about tools
There are tons of tools out there in the wild. Either online or for Windows, macOS, Linux, or all three. Even most modern browsers can show (and edit) the embedded CSS(es) of a webpage.
I have chosen Brackets[] for this tutorial for the following reasons:
It’s easy to install
It’s robust
It’s available on many platforms
It’s free of charge (open-source)
And most importantly it has a great “live” pre-view mode, which means you can see most changes you make in your files instantly in your browser or after a quick refresh. As such it can run as well all kinds of embedded scripts.
Once installed it is as simple to open the folder where your index.html and CSS are located (hang on a second, I’ll explain this in a minute).
Prerequisites
1. CSS File
I believe this one is confusing many people. How can I get the bootstrap.min.css Xojo is using as default if it is not provided by the IDE and is not visible in the compiled file? If you are lazy, just look at my Github repository “ Xojo Web 2 Bootstrap Boilerplate “, it is included there.
Alternatively, open your compiled or debugged app in a web browser of your choice and via the development tools find the bootstrap.min.css. You can usually download it by a simple right-clicking on that file.
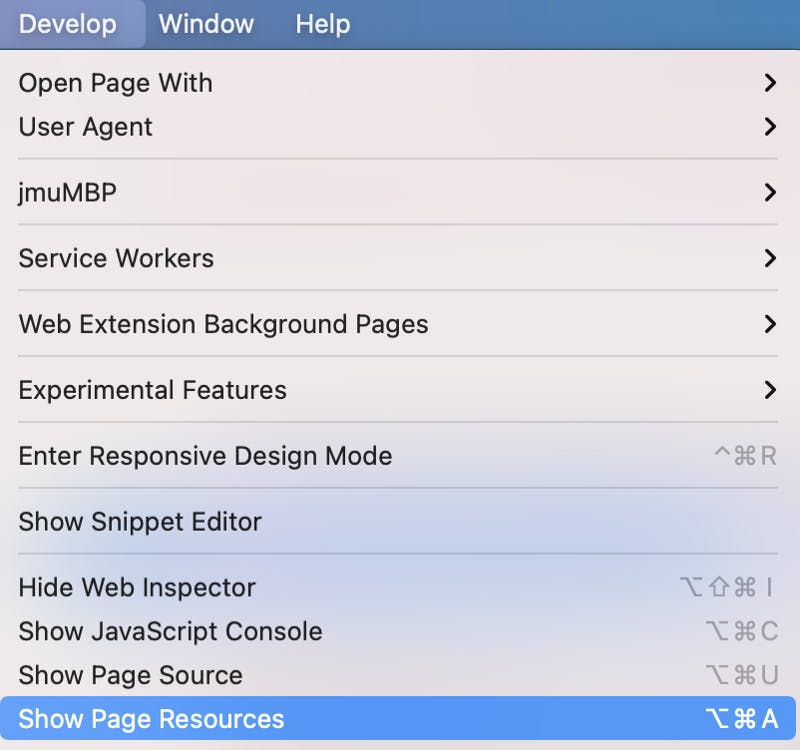
Therefore you have to activate the development features in Safari under Preferences “Show Develop menu in menu bar”:
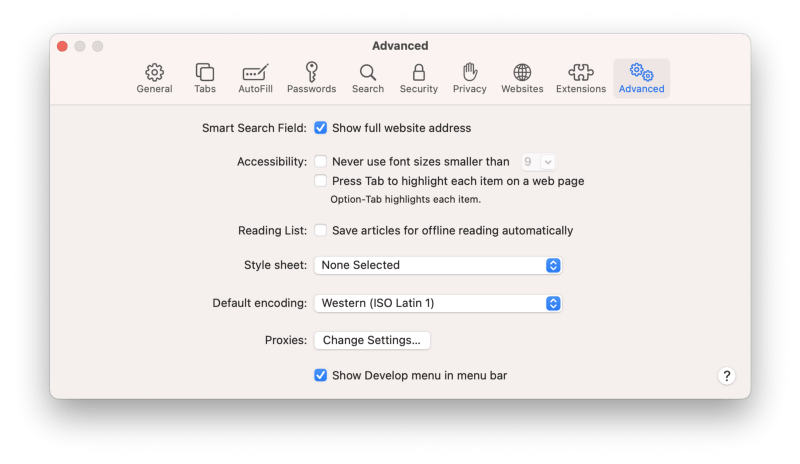
After activation, you can use “Show Page Resources” while your Xojo Web App is running.
I believe it is important to use exactly the version Xojo is using, mainly because you never know if they might change it or not. Newer versions of bootstrap might not be compatible in the future, though it currently seems they are.
The Bootstrap version used in Xojo Version 2020 Release 1.2 is Bootstrap v4.4.1. For your convenience, the GitHub repository “ Xojo Web 2 Bootstrap Boilerplate “ contains a folder “Original_Bootstraps” with the original Bootstraps per Xojo version.
If you look at the bootstrap.min.css file from the Simplex Theme, the used Bootstrap version is different: 4.5.3.
Tip: always comment on all changes you will make in your CSS-File! If Xojo will in the future change the used Bootstrap default file, it will be much easier to update that new version accordingly.
Please note that our CSS file is minified. Let’s first rename it from
bootstrap.min.css to bootstrap.css, which means skipping the “min”.This is a prerequisite for the next steps in our workflow.
Renaming doesn’t of course change anything that the file is still minified, but the conversion described in the next paragraphs will not work properly if you don’t rename this file first! So we now have two files, named differently but they are both still minified.
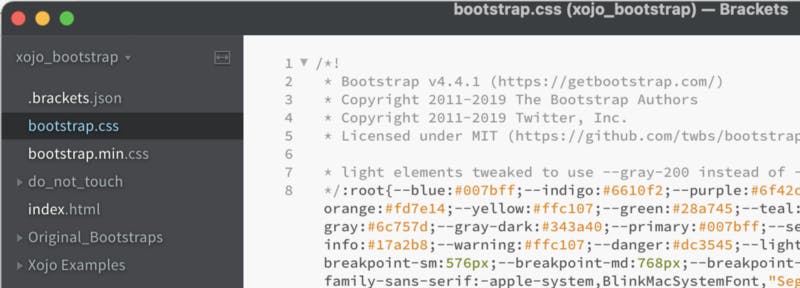
Open the app “Brackets” and chose the open folder to read the root folder of the Github repository “ Xojo Web 2 Bootstrap Boilerplate “.
You will now see the following screen:
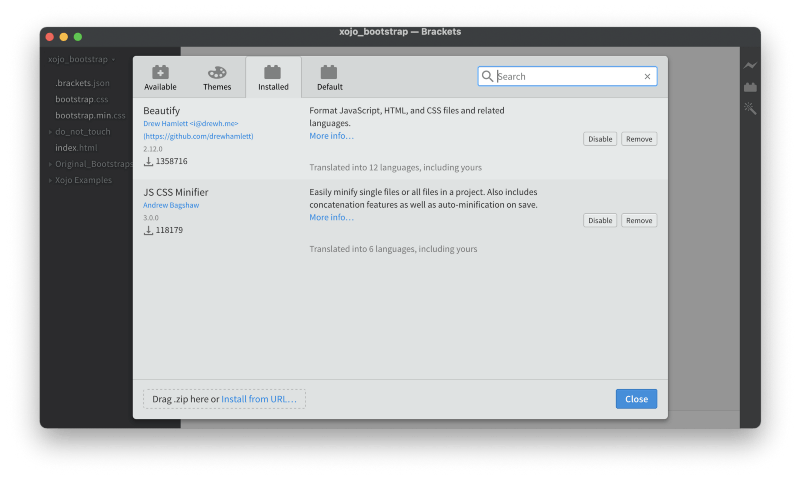
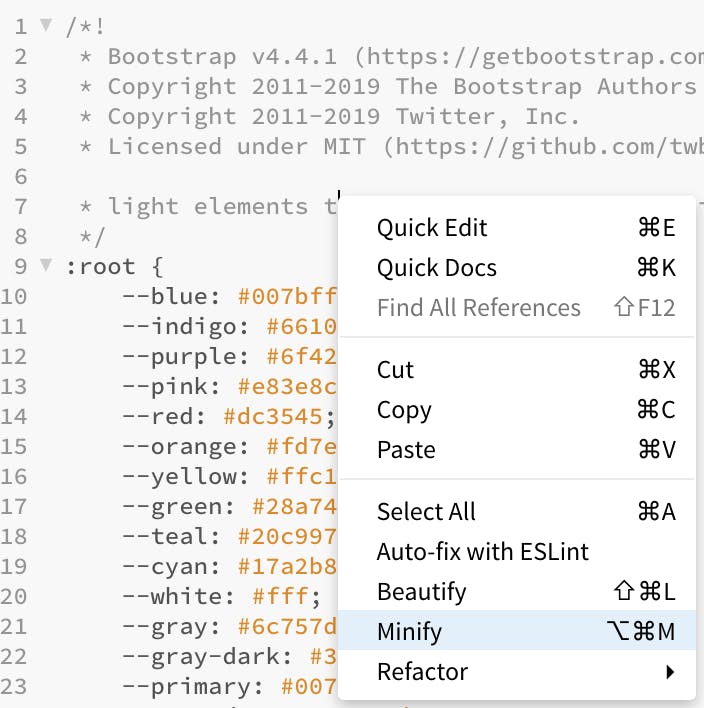
We can’t work with this minified version. Therefore let’s install some plugins. Brackets have its own Extension Manager. Please ensure that the following extensions are installed:
Beautify (this one is used to de-minify a file)
JS CSS Minifier (this one is minifying files)
BEAUTIFYING our CSS:
In our project mark the file bootstrap.css and click on the following icon on the right-hand side of the app:
Or use a right-click in the editor window:
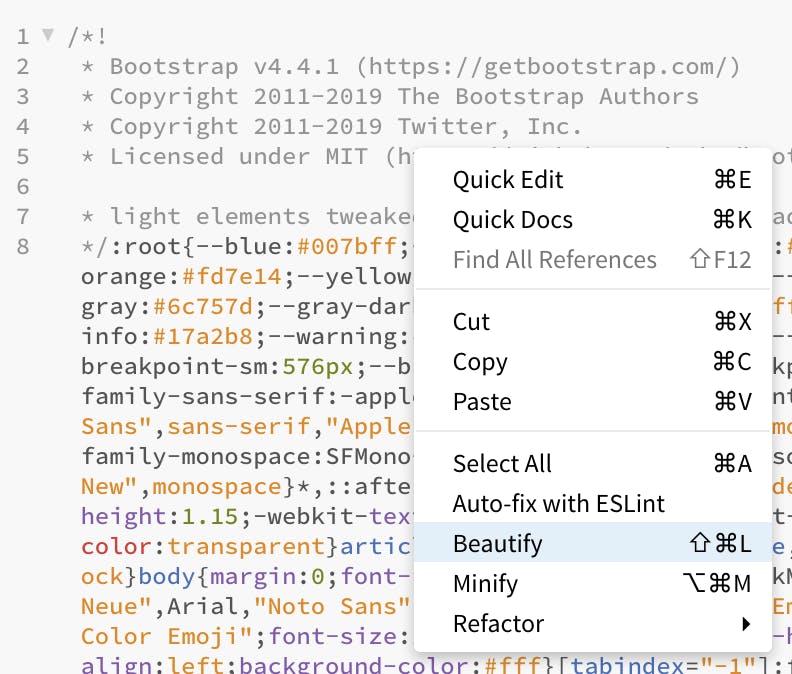
Brackets will now do all the magic and de-minify (beautify) your file:
Now we have finally a format that is human-readable and easier to edit!
MINIFYING our CSS:
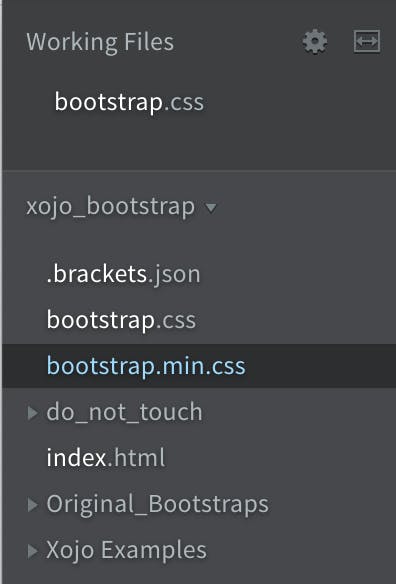
Vice-Versa you can use “minify” by right-clicking on the editor to create a new bootstrap.min.css file:
You can see in the outline, that a bootstrap.min.css file was created:
Remember that in your final product, you should always use the minified version only!
2. HTML File
We learned above that we can only see the changes we will make in our bootstrap file if the CSS file is embedded into an HTML file. But these HTML files need to use the objects from the CSS file. We can either build a Xojo App with all needed controls and then use the built-in CSS functionality of the browser or (and that’s what we’ll see right now) we have to work with a workaround.
Our workaround consists of building all controls into the HTML document which embeds our bootstrap.min.css.
For that purpose you will find the index file in the GitHub repository “ Xojo Web 2 Bootstrap Boilerplate “:
Finally, we can customize our bootstrap file
Before we are starting this work, please keep in mind that you must minify your results and you must ensure that the file is called “ bootstrap.min.css “ before you will drag&drop it into the Xojo IDE.
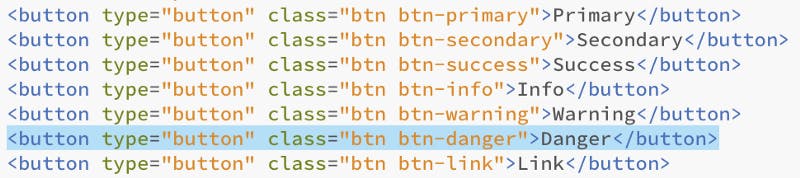
Please open our project in the preview mode of Brackets[]. We clicked in the internet browser the red button called “danger”. As you can see Brackets[] is immediately jumping to the code line responsible for drawing this button in HTML.
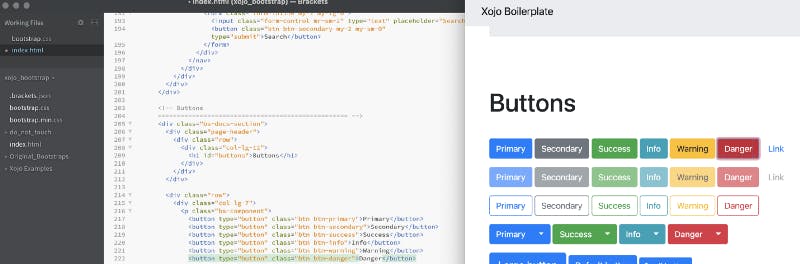
We can see that there is a class “btn” used by all buttons and a class “btn-danger” used only for the “danger”-button.
Let’s search our CSS file for “btn-danger” now:
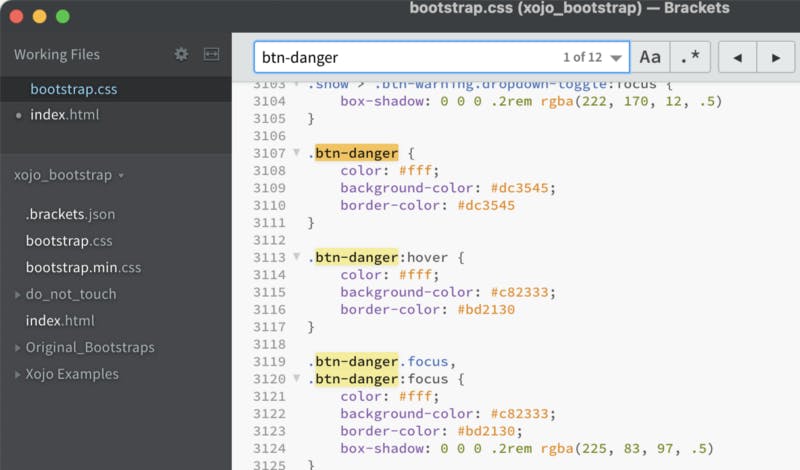
We can see that the class “btn-danger” (marked with a “dot”) has a colour property for the text. Let’s change this to “000” (black) and see if there is a change in the preview window:
What happened? Remember that we have the “minified” version of our CSS file embedded into the HTML document we are editing. But in our example, we are editing the “beautified” version of the CSS file! This means that we have to first create our minified version, as we had learned above:
And now we can see the changes. The text-color of our button “danger” has changed to “black”.

Let’s now move our “ bootstrap.min.css” file into our Xojo Project from the very beginning (remember you can find it in the Github repository “ Xojo Web 2 Bootstrap Boilerplate “ under “Xojo Examples”).
It doesn’t work for me!
I bet that you have used the wrong “ bootstrap.min.css “ file. As the file has to be named exactly in this way it is unfortunately very likely to mess up with files.
Especially as it is possible to drag&drop a normal CSS file into the IDE. You know that you have moved a valid bootstrap file if you the little Bootstrap icon:
“jeannots_special_css.css” is a duplicate of the “bootstrap.min.css” but it won’t work! You know that you did everything right if you will see the “Bootstrap-Icon” and if the name of your file magically changed to “bootstrapmin”.
What are the next steps?
The magic of Brackets[] is that it comes with a built-in “auto-complete”-functionality.
It is now up to you to design/adapt the bootstrap template as you see fit. It is pretty much similar to the changes you made in the Web 1 stylizer, but this template can not replace that you have to dig deeper into Cascading Style Sheets and how to customize them in the best possible way.
But it is important to keep one last thing in mind. All the changes you make in the Bootstrap Template are applied “globally” to the respective objects in your app.
This means that if you change one button in our HTML workaround HTML file, your generated “bootstrap.min.css” will logically apply to all those buttons in your Xojo Web App 2. If you want to change only one button you have to use the built-in “style-option” in Xojo Code or inject “”-code into this Xojo-object. You can find a few examples in the Xojo Forum. But not every object can be changed this way nor will available CSS and HTML attributes (yet) work.
2020/11/24 17:36
Added the Xojo Version 2020 Release 2 bootstrap.min.css to GitHub (for completeness, it doesn’t seem to have changed though).
2020/12/02 15:43
The following article shows how to adapt objects individually: